ASU Web Community Updates
The following updates relate to:
- Drupal 7 to Drupal 9 transition
- Recommendations for Webspark modules
- End of Life information for legacy Webspark

The following updates relate to:
An upstream update, Webspark v1.79.3 (Slapdash), has been released.
Users with Webspark sites on Pantheon will see the "Updates available!" notice on the dashboard (your connection mode must be set to Git). Before updating, backup your dev, test and live environments; click the "Apply Updates" button in dev; then test in dev. Only push the updates to test and live when you're sure they don't break your site. (Read "Update Your Site" for more detail.)
Users with Webspark sites not on Pantheon should update their code (see "Update Drupal Core" for instructions) on a dev site and test before moving changes to the live site. In this release, the following changes were made:
ASU has recently updated its standard web banner for the Fall 2021 semester to link to and align with key updates from the university. As such, every ASU website requires the current banner be swapped out with the new one shared below. This page contains instructions for developers and staff across the units/departments to seamlessly update the web banner on the ASU site(s) they manage. Please review and take the below actions to update the websites and webpages you manage as soon as possible. For questions, please see asu.edu/webservices.
An upstream update for Webspark will be released on Tuesday, August 17, 2021 - 8:00AM. This update must be applied for the following instructions to work.
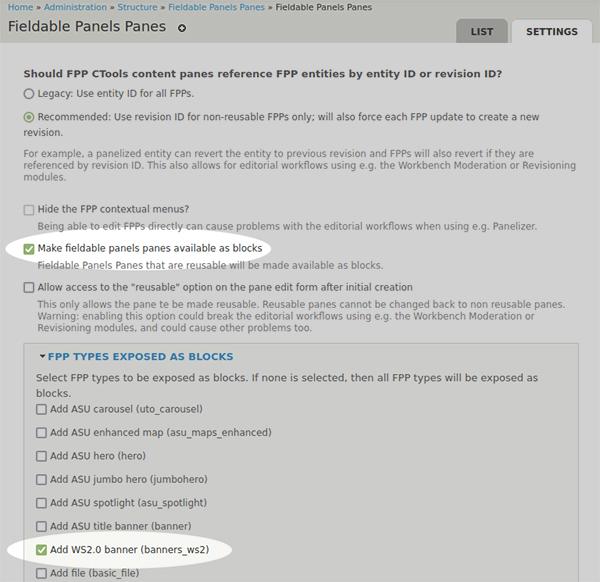
One-time configuration step: Update FPP settings to create a block containing the FPP banners
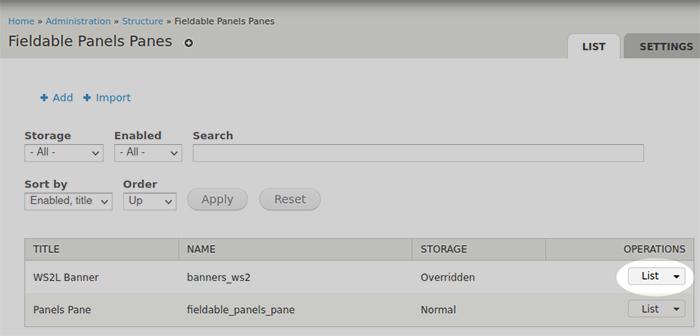
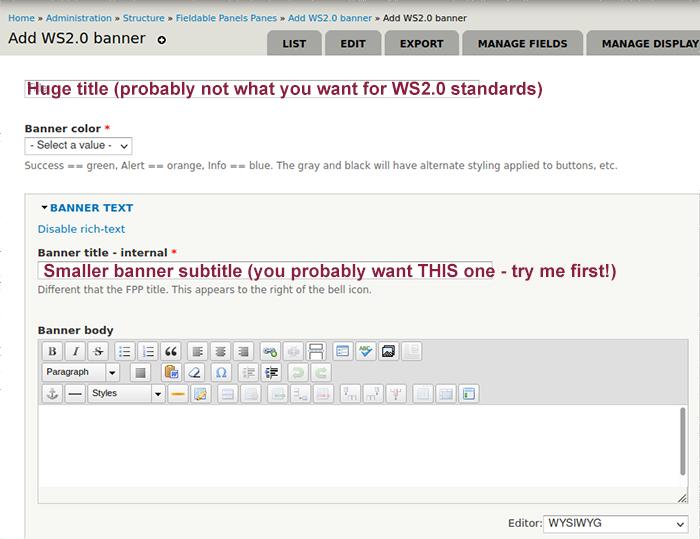
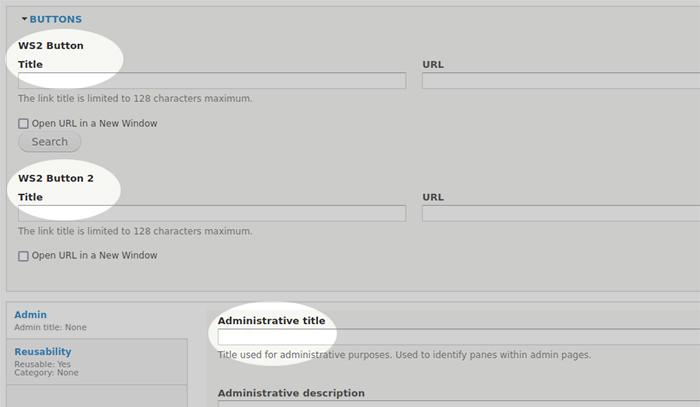
Step 1: Create the Banner
Step 2. Add the newly created block to the header region.
The banner should now appear on all web pages that are rendering the Content region. See screenshot below for an example of the final result (using the success/green style option):
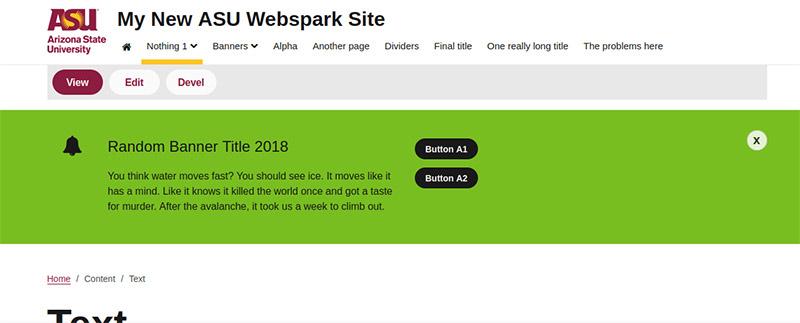
* If you are seeing the content of the newly created banner but not the correct color/styling, please make sure that Webspark is updated to the latest version available in the Pantheon dashboard (v1.79.3 - Slapdash). This latest update adds the styling to the headers - the color, etc. And be sure to clear the site's caches in the dashboard after applying the update.
* If that's not the issue, there could be many different reasons for the banner to not be showing so they can't all be covered here, unfortunately. However, we recommend that you first try to recreate the banner again following the steps above for any possible errors. If that doesn't help, see if the banner appears on any content pages at all. If it's not appearing anywhere and you are sure that you have followed the steps exactly, you likely need further assistance.
This does not require using a Drupal block and can be done solely within the In-Page Editor (IPE).
The banner should now appear as shown in the IPE preview.
In the new Webspark 2 distribution, you can add notification banners by adding custom blocks through layout builder. For more details read the step-by-step instructions or watch our training video on how to add notification banners to your website.
Moving to Drupal 8 or 9 can be a pretty overwhelming task. There are a lot of new technologies and techniques we will need to at least be familiar with that are different from what were used in Drupal 7. Check out the information below to ease the transition:
The UTO partnered with One Origin to present tutorials on key components of Drupal 9. If you missed a training, session need a refresher or are looking for a slide deck that was presented at the training, please see our two canvas courses:
The ASU Brand Guide also has training resources for Drupal 9.
Looking for ideas? See how the Watts College has prepared to transition their sites.
Please take note of the following important update related to Drupal’s Local iSearch View functionality. This functionality currently allows for customizations to how isearch profile data is displayed locally on your Drupal 7 (D7) sites. Your department will be impacted in your upcoming transition to Drupal 9 (D9) if you have this functionality enabled and your site is extensively pulling data from iSearch. Please work with your site’s website developer to prepare for your upcoming migration to D9 accordingly.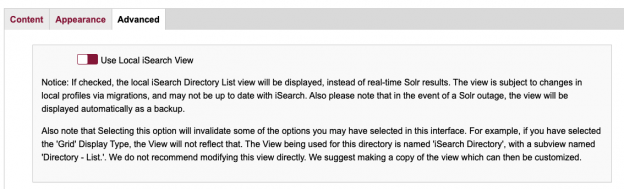
Known Issues with D7
In the past, the UTO has collaborated with units to address some (not all) of the following Local iSearch View functionality challenges on D7 sites. Known issues include:
Manual import errors of directory profiles. Too many record imports result in the system erroring out.
Delays with (data) updates
Incomplete (data) update
Manual mode search functionality is not specific enough; searching yields results that are not relevant.
Sort by selection for manual mode does not work with multiple paginated pages.
Links from social media platforms are preventing proper population of iSearch profiles when directly linked.
Display names are not always properly recognized when sorting.
Unfortunately, given the effort and complexity of development required to fix (in D7) and carry forward these fixes to D9 has become an insurmountable task with respect to competing priorities and resource constraints.
What to Expect with D9
The Local iSearch View functionality along with Local iSearch View related fixes to your D7 site will not carry forward to your D9 sites based on what we know today.
How to prepare for D9 if you are using Local iSearch View:
Please begin testing your current sites (in dev or test) by turning off “Use local iSearch View” and swap back to your site’s default view. Goal: to alleviate complications during your upcoming migration to D9.